Showing posts with label JoyfulRose. Show all posts

Friday, April 10, 2020

JoyfulRose Face Mask Comfort Band Ideas and Tutorials

After wearing my mask to get groceries last week I discovered that the mask elastic made my ears hurt! It made me feel so bad for all of our medical workers who wear masks all day long. :( I fell asleep trying to think of ideas that would help, and here they are!

There are 5 different ideas: Pipe Cleaner, Elastic with sewn-on buttons, Grosgrain Ribbon with sewn-on buttons, Grosgrain Ribbon with snaps, and Hook & Loop (velcro).

Click image to view full size:

Click on the following links for individual instructions for making each type of Comfort Band:

Elastic and Buttons
https://joyfulrosedesigns.blogspot.com/2020/04/joyfulrose-face-mask-comfort-bands.html

Ribbon and Buttons:
https://joyfulrosedesigns.blogspot.com/2020/04/joyfulrose-face-mask-comfort-bands_10.html

Ribbon and Snaps:
https://joyfulrosedesigns.blogspot.com/2020/04/face-mask-comfort-bands-ribbon-and-snaps.html

Hook and Loop (Velcro):
https://joyfulrosedesigns.blogspot.com/2020/04/face-mask-comfort-bands-hook-and-loop.html

JoyfulRose Face Mask Comfort Bands: Elastic with Buttons

Tutorial for making Face Mask Comfort Bands: Elastic with Buttons

Click on image to view full size:

JoyfulRose Face Mask Comfort Bands: Ribbon and Buttons

Tutorial for Making Face Mask Comfort Bands: Ribbon and Buttons 

Click on image to view full size:

JoyfulRose Face Mask Comfort Bands: Ribbon and Snaps

Tutorial for Making Face Mask Comfort Bands: Ribbon and Snaps.

Click on image to view full size:

JoyfulRose Face Mask Comfort Bands: Hook and Loop (Velcro)

Tutorial for Making Face Mask Comfort Bands: Hook and Loop (Velcro). 

Click on image to view full size:

JoyfulRose Fitted Face Mask Tutorial

Here's a quick tutorial I put together for fitted face masks. Hopefully it's detailed enough to be understood. These take me about 15 minutes to make each one. There are a lot of steps, but the mask goes together fairly quickly.

I love this design! Especially with the long elastic that doesn't hurt my ears. This is my preferred design for myself and family.

Fairly quick and easy to make, especially with the use of a serger and a sewing machine, but you could use just a sewing machine if you don't have a serger.

Pros: fairly easy to make, very comfortable design, contoured design shapes nicely to face, filter sewn-in, reusable (can wash, dry, and iron after every use.)

Cons: a little bit harder to breathe through, seems very intimidating to make at first glance!

Click on image to view full size. :)


Masks I've made thus far:

Revised on 14 April 2020 to add the pattern templates I used :)
Click each image to view full size. Each is on a standard 8.5" x 11" sheet of paper. The square is 1" measured on the inside of the square. Hope that helps!


JoyfulRose Pleated Face Mask Instructions

Hi all! I finally finished up the instructions for a pleated face mask with pipe cleaner added to the nose area. These take me about 10-15 minutes to make each one.

Pros: fairly easy to make, comfortable design, fits a wide variety of face shapes, filter sewn-in, fairly easy to breathe through, reusable (can wash, dry, and iron after every use).

Cons: ear bands were very uncomfortable after just a few minutes (see my other tutorial for comfort bands!), elastic was too long for me so the fit wasn't very tight, a bit difficult to iron the pleats after laundering.

Click on image to view full size. :)


All the face masks I've made thus far:

Monday, September 28, 2015

Making my own shoes: Dritz Espadrilles!

Step 1 to becoming a real Elf: Make your own shoes.
Done and done!

Last week I used kits from Dritz to make shoes for me and my girls. I LOVE how they turned out! And guess what? Making these cute little espadrilles is fairly easy!

The girls love Disney's "Frozen", so all of our shoes are inspired by clothing worn by sisters Anna and Elsa. My girls have only taken off their shoes to sleep and bathe. :)


Thursday, September 10, 2015

Mermaid Tails!

A few weeks ago, my sweet little girls asked if I could make them mermaid tails for swimming! I took out my handy roll of butcher paper and traced each girl to make their tail patterns. For the tankini and shorts, I used a darling pattern from Peekaboo Pattern Shop.

I made them out of shiny swim/dance fabric and Babyville Boutique Foldover Elastic from my local JoAnn Fabric store. I absolutely LOVE how they turned out!

We tried them out the next day at my sister's community pool and they work perfectly. So much so, that my niece knew exactly what she wanted for her birthday present this year. :)


Tuesday, August 18, 2015

Spoonflower Contest Entry: Roses and Lilies

Handwriting, hand-drawn swirls, and vintage 1800's floral sketches are combined to bring to life a gorgeous, antique sketchpad!

Designed especially for the Fabric8: Botanical Sketchbook contest. :) Swirls can be removed for a repeating design:


Saturday, August 15, 2015

Sewing for Baby: Finished!

Finished some last-minute cuddlies for baby! Car seat canopy, boppy cover, minky blanket, jersey blanket...and a couple of gifts for family. :)


Friday, August 14, 2015

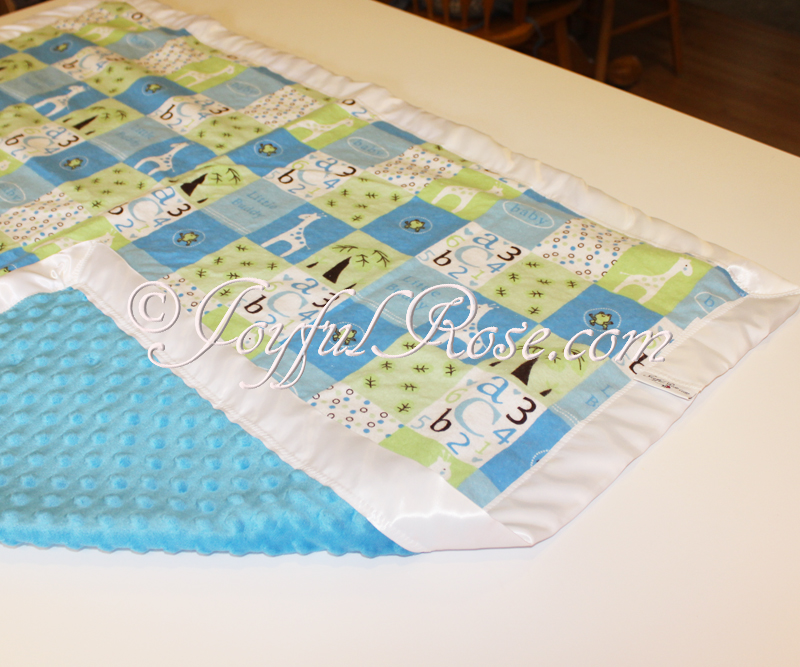
Sewing for Baby: Minky Baby Blanket

This is my favorite project so far! Super soft minky, cuddle soft flannel, silky blanket binding....mmm! Can't wait to try it out. :)


Thursday, August 13, 2015

Sewing for Baby: Car Seat Canopy

I LOVE how this turned out! It was the first time I sewed a car seat canopy with bias tape, and I think it looks really sharp. :)


Monday, August 10, 2015

Sewing for Baby: Boppy Cover

Finished this cover the other day and LOVE how it turned out! Soft minky on one side; soft flannel on the other. I've been needing a new cover for awhile. :)

Made the pattern myself and it worked pretty well! (Someday I'll have to ask Mom to teach me how to put zippers in so they look beautiful.)


Friday, December 19, 2014

Free Tutorial: Carefree Cup Cozy

Today I needed a fun, useful gift for my husband's boss. I quickly made a couple of these and she was thrilled! Happiness all around. :)

I also found a really cute "coffee cup cosy" poem, originally by Yvonne Lowther, and adapted it to use as a gift tag.
Click Here to download the JoyfulRose Carefree Cup Cozy Template
(Note: These are PDFs, so you'll need Adobe Acrobat Reader to open all the files in this tutorial)

Click Here to download the single Cup Cozy Poem

Click Here to download the full page Cup Cozy Poem (4 poems on a regular letter-sized page)

Supplies for 1 Cup Cozy:
About 12" wide x 4" tall outer fabric (I used Babyville Boutique Sassy Girl Cheetah PUL)
About 12" wide x 4" tall inner fabric (I used JoAnn Fabrics Cream Fleece)
4" of 1/4" wide elastic
3.25" of FOE (I used Babyville Boutique Solid Brown Fold Over Elastic)
Label (I used Babyville Boutique Little Bird and Hearts "Love")
3/4" Button
Sewing Machine, needle, thread, scissors, cutting board, needles

Note: this pattern and tutorial are for a small store-bought coffee cup. It's made with elastic so it can expand to fit a cup snugly, but if you're using a much larger or smaller than average cup, you made need to alter this tutorial to fit. :)

Instructions:
1. Print and cut out the Cup Cozy Template
2. Fold PUL in half width-wise, place Template on fold, and cut. Do the same for the Fleece
3. Match up PUL and Fleece, right sides together, and sew along top, bottom, and one side. Clip corners so they'll turn nicely
4. Turn right side out and cover-stitch
5. Place FOE along the side that wasn't sewn and use a wide zig-zag to stitch. Use Fray Check on edges or heat-seal
6. Place Label in center and middle of Cup Cozy and sew
7. Loop elastic, match raw edges to edge of FOE and sew very securely
8. Measure in about 1.5" from sewn side of Cup Cozy and sew button in the center, very securely
9. Make another one so you have a pair!
10. Print poem using above download link, wrap Cup Cozies with poem, and give to your favorite coffee or hot chocolate-drinking friend :)


Wednesday, December 17, 2014

Free Tutorial: Wildly Cute Essential Oils Holder

Do you need an awesome gift for your favorite guy?

I recently introduced my sister and brother-in-law to essential oils and needed a manly Christmas present for him. That's how this awesome camo essential oils holder was born. It's now under the tree and waiting for Christmas morning!

Finished Size: About 3.5" wide x 7" long.

Note:
My essential oils holder is made to hold 10 of the 5/8 dram bottles, or 8 of the 5/8 dram bottles and 1 of the 2.5" long roller bottles. If you'll be using different-sized bottles please take that into consideration when cutting fabric and elastic.

Supplies:
About 9" x 5" PUL (I used Babyville Boutique Camo)
About 9" x 5" Coordinating Fleece or another soft, thick fabric (I used JoAnn Fabrics Cream Fleece)
Label - Born to be Wild, from Babyville Boutique
Button - 3/4"
About 20" of 1/4" wide Elastic
7" Babyville Boutique Brown FOE (Fold Over Elastic)
Sewing Machine, Thread, Scissors, Cutting Board, Pins, Fabric Marking Pen

Instructions:
1. Cut PUL and Fleece to 4.75" wide x 8.25" long
2. Place PUL and Fleece right sides together and sew along both sides and bottom, using a 5/8" seam allowance.
3. Turn right side out, top-stitch, and then sew FOE along the top
4. Cut about 4" of elastic, fold in half, match ends to bottom of FOE on outside, and stitch along FOE sew line (be sure to sew this part very securely, back-stitching several times)
5. Sew label so that the top of it is about 1.5" above bottom of Holder, on outside
6. Sew button so that the top of it is about 1/2" above bottom of Holder, on outside
7. Cut 2 pieces of elastic, each about 7 and 3/4" long
8. On inside, measure 1" below top of of Holder and draw a horizontal line with your fabric marking pen. Measure 1.5" below that line, and draw another horizontal line
9. On inside, on first line, starting from left side, put a little dot with fabric marking pen every 5/8ths of an inch, for a total of 6 dots. Do the same for the second line, making sure dots line up vertically with those on first line
10. Mark the elastic: for both pieces of elastic, measure in about 1/4" from edge and make a dot with marking pen. Measure in about 1.5" from that dot and make another dot. Continue until you've made 6 total dots
11. On inside, on first line, starting from the left side, match 1st dot of one of the pieces of elastic to 1st dot on fabric and stitch vertically (be sure to double-stitch each of these lines to make sure the elastic doesn't come undone as it stretches to hold your essential oils bottles!) Continue matching dots and sewing until all 6 dots are matched and sewn. Then do the same for the 2nd row and 2nd piece of elastic
12. Add essential oils bottles and enjoy!

Monday, December 15, 2014

Free Tutorial: Simply Cute 10-Minute Stockings

Need a super fast, super cute Christmas gift? These stockings are perfect! It takes about 10 minutes to do all 3. They're about 4" x 5", and are just right for a full-size candy cane and some candy. Use them for decoration, as gift tags on a present, or make a bunch for Christmas tree ornaments! Also, they take so little fabric that it's a great way to use up scraps.


Click Here to download the free JoyfulRose Stocking Template
Note: it's a PDF, so you'll need Adobe Acrobat Reader to open it

Supplies:
Stocking Template
Scraps of non-fraying fabric (I used 3 different patterns of Babyville Boutique PUL, but you could also use felt or fleece)
About 15" of 1/4" wide ribbon (I used Babyville Boutique Pink Floral Ribbon)
Sewing Machine, thread, cutting board, scissors, pins, needle

Instructions:
1. Print and cut out template
2. Fold fabric in half, wrong sides together
3. Trace template onto fabric and cut through both layers of fabric
4. Cut a 5" length of ribbon
5. Keep fabric wrong sides together, fold ribbon into a loop and place at top left corner
6. Sew along sides (not the top!) with a 5/8" seam allowance, using a wide stitch (or hand stitch)
* Tip: Be sure to stitch securely, especially the top sides.
7. Make at least 2 more stockings.
8. Fill with goodies and enjoy!

Thursday, September 25, 2014

100+ New Designs at Spoonflower!

Chevrons, Quatrefoil, Houndstooth, Damask, Steampunk, Frozen Inspired, Minecraft Inspired, and MORE!!!

We've been hard at work over the past few months creating new, unique designs for you. Perfect for the upcoming holidays!

Head on over to our Spoonflower shop and take a look. :)

http://www.spoonflower.com/profiles/joyfulrose


Monday, June 16, 2014

Spoonflower Tip: JoyfulRose Minecraft Inspired Grass Block Pillow

I received a question last week about making pillows using my grass block design. Thought I'd post a quick tip in case anyone else has the same question. :)

I've taken screenshots of both of my grass block designs: the regular and the rotated. Click the image below to see a detailed picture. Pink lines mark a 20" square (about 50cm). Blue line indicates a yard.


If you purchase 1 yard of fabric, you can make one 20" pillows/cases. You'd have about 16" of fabric leftover.

If you purchase 2 yards of fabric, you can make two 20" pillows/cases. You'd have about 32" of fabric leftover (great for a little throw blanket!)

Remember that if you cut 20" squares and sew them together, they'll end up about 18" or 19" depending on your seam allowance. :)

Hope that helps!

Click here to purchase the regular minecraft inspired grass block (design on the left)

Click here to purchase the rotated minecraft inspired grass block (design on the right)

Thursday, June 5, 2014

Spoonflower Free Swatch Day!!!

Guess what?! For the next 24 hours you can get a free swatch of faux suede from Spoonflower!
Spoonflower is the company for which I do a lot of fabric, wrapping paper, and wallpaper designs.
Click here to try it out!


Click here for more info:
Spoonflower Blog - Free Swatch Day Info

Blog Archive


Web Design by JoyfulRose