Showing posts with label sewing. Show all posts

Friday, April 10, 2020

JoyfulRose Face Mask Comfort Band Ideas and Tutorials

After wearing my mask to get groceries last week I discovered that the mask elastic made my ears hurt! It made me feel so bad for all of our medical workers who wear masks all day long. :( I fell asleep trying to think of ideas that would help, and here they are!

There are 5 different ideas: Pipe Cleaner, Elastic with sewn-on buttons, Grosgrain Ribbon with sewn-on buttons, Grosgrain Ribbon with snaps, and Hook & Loop (velcro).

Click image to view full size:

Click on the following links for individual instructions for making each type of Comfort Band:

Elastic and Buttons
https://joyfulrosedesigns.blogspot.com/2020/04/joyfulrose-face-mask-comfort-bands.html

Ribbon and Buttons:
https://joyfulrosedesigns.blogspot.com/2020/04/joyfulrose-face-mask-comfort-bands_10.html

Ribbon and Snaps:
https://joyfulrosedesigns.blogspot.com/2020/04/face-mask-comfort-bands-ribbon-and-snaps.html

Hook and Loop (Velcro):
https://joyfulrosedesigns.blogspot.com/2020/04/face-mask-comfort-bands-hook-and-loop.html

JoyfulRose Face Mask Comfort Bands: Elastic with Buttons

Tutorial for making Face Mask Comfort Bands: Elastic with Buttons

Click on image to view full size:

JoyfulRose Face Mask Comfort Bands: Ribbon and Buttons

Tutorial for Making Face Mask Comfort Bands: Ribbon and Buttons 

Click on image to view full size:

JoyfulRose Face Mask Comfort Bands: Ribbon and Snaps

Tutorial for Making Face Mask Comfort Bands: Ribbon and Snaps.

Click on image to view full size:

JoyfulRose Face Mask Comfort Bands: Hook and Loop (Velcro)

Tutorial for Making Face Mask Comfort Bands: Hook and Loop (Velcro). 

Click on image to view full size:

JoyfulRose Fitted Face Mask Tutorial

Here's a quick tutorial I put together for fitted face masks. Hopefully it's detailed enough to be understood. These take me about 15 minutes to make each one. There are a lot of steps, but the mask goes together fairly quickly.

I love this design! Especially with the long elastic that doesn't hurt my ears. This is my preferred design for myself and family.

Fairly quick and easy to make, especially with the use of a serger and a sewing machine, but you could use just a sewing machine if you don't have a serger.

Pros: fairly easy to make, very comfortable design, contoured design shapes nicely to face, filter sewn-in, reusable (can wash, dry, and iron after every use.)

Cons: a little bit harder to breathe through, seems very intimidating to make at first glance!

Click on image to view full size. :)


Masks I've made thus far:

Revised on 14 April 2020 to add the pattern templates I used :)
Click each image to view full size. Each is on a standard 8.5" x 11" sheet of paper. The square is 1" measured on the inside of the square. Hope that helps!


JoyfulRose Pleated Face Mask Instructions

Hi all! I finally finished up the instructions for a pleated face mask with pipe cleaner added to the nose area. These take me about 10-15 minutes to make each one.

Pros: fairly easy to make, comfortable design, fits a wide variety of face shapes, filter sewn-in, fairly easy to breathe through, reusable (can wash, dry, and iron after every use).

Cons: ear bands were very uncomfortable after just a few minutes (see my other tutorial for comfort bands!), elastic was too long for me so the fit wasn't very tight, a bit difficult to iron the pleats after laundering.

Click on image to view full size. :)


All the face masks I've made thus far:

Monday, April 6, 2020

Face Masks Finished!

I finally finished face masks requested by my sweet sister-in-law for her hospital in Massachusetts (she's one of the many amazing nurses working to help people at this scary time).

Also finished face masks for my parents and parents-in-law, and my family! 
Tomorrow I'll work on masks for other family members, as well as a tutorial and the adjusted patterns. :)

First set: pleated pattern based on the one from JoAnn Fabrics. 


Second set: fitted pattern found on YouTube and adjusted larger (for my husband) and smaller (for my little kids).

Our family's face masks: 

These 4 were made using my fabric designs from Spoonflower! 

Friday, August 14, 2015

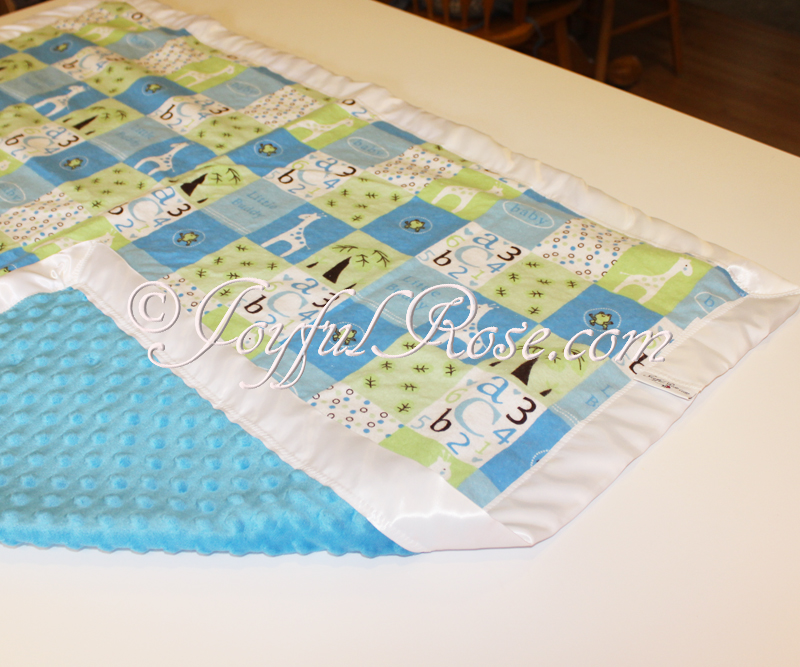
Sewing for Baby: Minky Baby Blanket

This is my favorite project so far! Super soft minky, cuddle soft flannel, silky blanket binding....mmm! Can't wait to try it out. :)


Thursday, August 13, 2015

Sewing for Baby: Car Seat Canopy

I LOVE how this turned out! It was the first time I sewed a car seat canopy with bias tape, and I think it looks really sharp. :)


Monday, August 10, 2015

Sewing for Baby: Boppy Cover

Finished this cover the other day and LOVE how it turned out! Soft minky on one side; soft flannel on the other. I've been needing a new cover for awhile. :)

Made the pattern myself and it worked pretty well! (Someday I'll have to ask Mom to teach me how to put zippers in so they look beautiful.)


Tuesday, May 26, 2015

Free Tutorial: Quick and Easy Couch Caddy

Are you having a hard time keeping track of TV remotes? Looking for something to make for Father's Day? Here's the perfect solution!

Click Here to view the entire tutorial at Babyville Boutique!

Wednesday, December 17, 2014

Free Tutorial: Wildly Cute Essential Oils Holder

Do you need an awesome gift for your favorite guy?

I recently introduced my sister and brother-in-law to essential oils and needed a manly Christmas present for him. That's how this awesome camo essential oils holder was born. It's now under the tree and waiting for Christmas morning!

Finished Size: About 3.5" wide x 7" long.

Note:
My essential oils holder is made to hold 10 of the 5/8 dram bottles, or 8 of the 5/8 dram bottles and 1 of the 2.5" long roller bottles. If you'll be using different-sized bottles please take that into consideration when cutting fabric and elastic.

Supplies:
About 9" x 5" PUL (I used Babyville Boutique Camo)
About 9" x 5" Coordinating Fleece or another soft, thick fabric (I used JoAnn Fabrics Cream Fleece)
Label - Born to be Wild, from Babyville Boutique
Button - 3/4"
About 20" of 1/4" wide Elastic
7" Babyville Boutique Brown FOE (Fold Over Elastic)
Sewing Machine, Thread, Scissors, Cutting Board, Pins, Fabric Marking Pen

Instructions:
1. Cut PUL and Fleece to 4.75" wide x 8.25" long
2. Place PUL and Fleece right sides together and sew along both sides and bottom, using a 5/8" seam allowance.
3. Turn right side out, top-stitch, and then sew FOE along the top
4. Cut about 4" of elastic, fold in half, match ends to bottom of FOE on outside, and stitch along FOE sew line (be sure to sew this part very securely, back-stitching several times)
5. Sew label so that the top of it is about 1.5" above bottom of Holder, on outside
6. Sew button so that the top of it is about 1/2" above bottom of Holder, on outside
7. Cut 2 pieces of elastic, each about 7 and 3/4" long
8. On inside, measure 1" below top of of Holder and draw a horizontal line with your fabric marking pen. Measure 1.5" below that line, and draw another horizontal line
9. On inside, on first line, starting from left side, put a little dot with fabric marking pen every 5/8ths of an inch, for a total of 6 dots. Do the same for the second line, making sure dots line up vertically with those on first line
10. Mark the elastic: for both pieces of elastic, measure in about 1/4" from edge and make a dot with marking pen. Measure in about 1.5" from that dot and make another dot. Continue until you've made 6 total dots
11. On inside, on first line, starting from the left side, match 1st dot of one of the pieces of elastic to 1st dot on fabric and stitch vertically (be sure to double-stitch each of these lines to make sure the elastic doesn't come undone as it stretches to hold your essential oils bottles!) Continue matching dots and sewing until all 6 dots are matched and sewn. Then do the same for the 2nd row and 2nd piece of elastic
12. Add essential oils bottles and enjoy!

Thursday, December 11, 2014

Free Tutorial: Fast and Festive Gift Bag

Need a quick gift bag? This one is super easy! It takes about 15 minutes, including gathering all the materials.

 Supplies:
About 1/3 yard of fabric (I used Babyville Boutique Chevrons and Solid Red PUL)
About 20" of 1/4" wide ribbon (I used Babyville Boutique Forest Friends Ribbon)
Sewing Machine, cutting board, scissors, pins, thread, needle

Instructions:
1. Cut the chevron BBVL PUL a bit wider than your gift and twice as long (I added about 4 inches of red PUL at the top and bottom to make it more Christmas-y)
2. Fold the PUL in half lengthwise, right sides together
3. Sew the 2 sides together and turn right side out
4. Sew a 20" long BBVL ribbon to the back
5. Insert gift, gather top of bag, tie in a cute bow. 
Done and done!
Tuesday, March 4, 2014

Spoonflower - Creations Made from my Designs! - Minecraft Body Pillow

I think this is the coolest body pillow ever!!!
It was made by Karen Williamson's mother for her son's Minecraft room. She used my Spoonflower fabric design found here: http://www.spoonflower.com/designs/2479856

Love it!

Thanks for the pic Karen!

Friday, December 27, 2013

Minecraft Pillowcases!

For Christmas I made pillowcases for my children and nephews. I used one of my very favorite fabrics that I designed and had printed through Spoonflower...Minecraft!

I did a simple monogram with swatch fabric with the first letter of each of their names. The kiddos loved their pillowcases and have been using them ever since. :)

My Spoonflower shop:

Tuesday, August 3, 2010

Website for SEWsational Sarah, Mock-up

I've worked with Sarah before and am very excited to be working on her web design! Her products are wonderful and I happily recommend her shop.

Sarah wanted a site that matched her Hyena Cart with whites, greys, and blacks. She wanted four click-able buttons: Hyena Cart, Etsy, Sweet Retreat, and Facebook. She sent me 7 product pictures and asked that they be scattered around the edges of her site and that their edges be faded/blurred to blend into the background.

Here's the first mock-up! Click image to view larger:

Wednesday, June 16, 2010

Animated Banners for "SEWsational Sarah"

Sarah wanted a couple of updated banners with her newest creations. She gave me the text and pics to include and said she wanted something eye-catching.

I thought it would be fun to place her text and pictures on a woven texture to represent her sewn items.

Hyena Cart, where she does most of her advertising, only allows for animated files up to 128kb, so unfortunately I had to cut down the original banner design to fit within the limitations. I created two 468x60 animated banners; first one in a smaller size to use on HC; second is the larger size to use everywhere else. :)


And a bonus 120x240 size :)

Wednesday, May 12, 2010

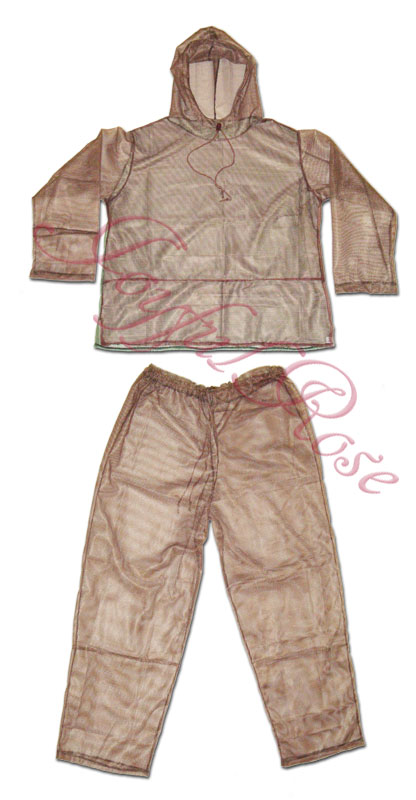
Sewing Project for Cameron

Cameron gave me laundry bags (8 brown; 2 green), a pajama/loungewear pattern, and instructions to reinforce all the seams, skip the pockets, and use the ties from the laundry bags for the hoods and pant waists.

This is probably the most interesting sewing project I've done!

It took me more than twice as long as I'd originally planned, but I think the outfits turned out very nicely. I serged the seams and then sewed over them with a regular sewing machine, and also triple-stitched the underarms and crotch areas.

I'm interested to see pictures of Cameron's project. :)

Click images to view larger:


Wednesday, January 27, 2010

Animated Banners for "SEWsational Sarah", Part 2

Sarah loved the last banner I made for her and I was excited to have creative license for her last 2 banners. :)

First is a 120x60 size that fits the small button advertising on Hyena Cart. I made this one to match the first 468x60 banner I made for her.

Second is a 468x60 banner which is the standard web banner size. I had a lot of fun creating the "swirl" effect with her logo!


Blog Archive


Web Design by JoyfulRose